

The Basics: Getting Ready to Film a Great Biking Video
Before diving into the details, it’s important to start with the basics because great biking videos begin well before you hit record.
Proper planning and the right gear are essential for capturing dynamic, smooth, and visually stunning footage, whether it’s a fast-paced ride on a dirt trail or a scenic descent through the mountains.
All that being said, here are some things to keep in mind when getting ready to film a great biking video:
Know the Trail and the Challenges
Each biking trail presents its own filming challenges. For example, forest paths, while visually appealing, can have irregular lighting, which can confound camera sensors. Mountainous terrain may provide breathtaking views, but it can be physically demanding on both riders and equipment. Dirt tracks, which are popular in sports biking, are perfect for speed photos but also produce dust, which can damage lenses and equipment.
That’s why, before filming, it’s essential to understand the trail conditions, elevation changes, and key landmarks. Checking local regulations is also important, especially when using drones. Many parks and protected trails require permission to record aerial footage or create commercial material. Ensuring compliance with these principles helps to avoid disruptions and promotes responsible filming techniques.
Essential Gear Checklist
Having the proper equipment may make or break a bike video shot. That said, some of the recommended gear includes:
● Action Cameras: GoPro, DJI Action, or similar models are compact, rugged, and optimized for high-motion environments.
● Drone: Perfect for capturing sweeping aerial views of the trail, surroundings, and group rides.
● Mounts and Gimbals: Helmet and chest mounts provide immersive POV footage, while gimbals stabilize handheld shots for smoother video.
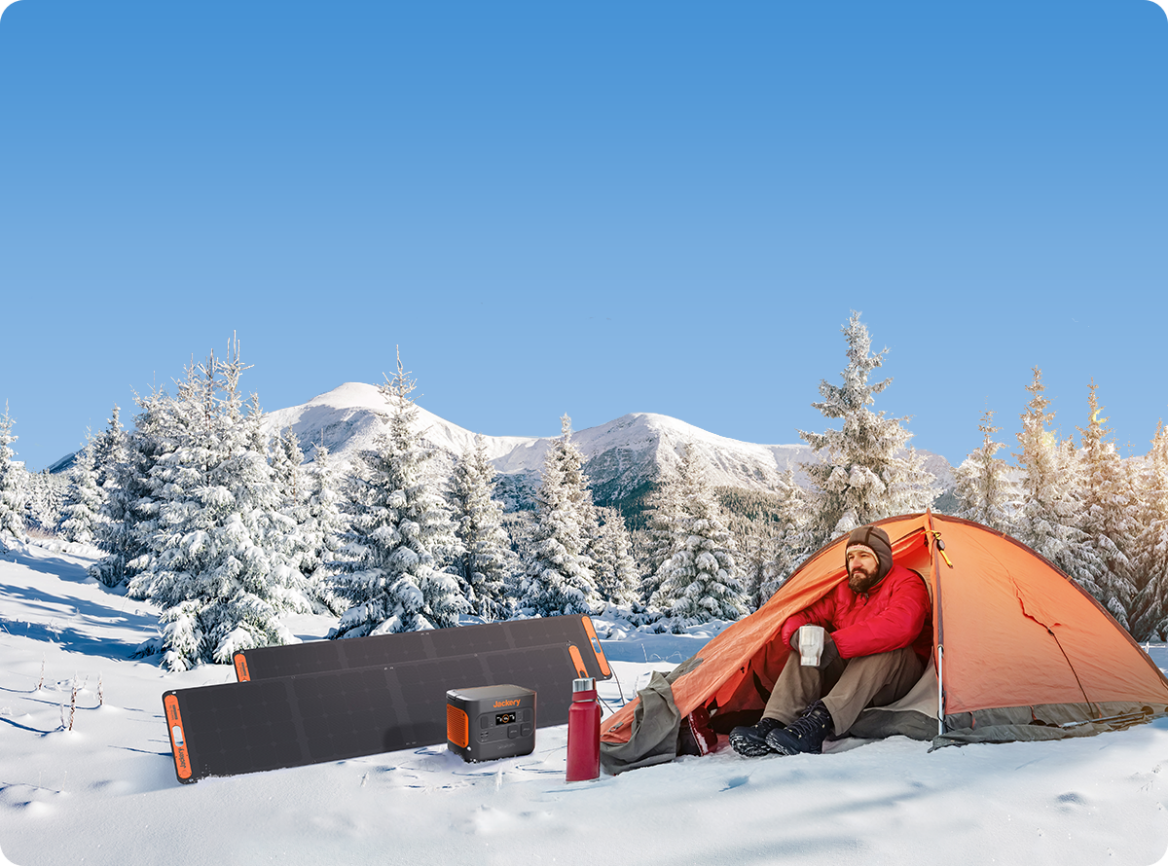
● Portable Power Station: The Jackery Explorer 240 v2 Portable Power Station is an ideal solution for off-grid shoots. This portable power station option allows continuous charging of action cameras, drones, phones, and even editing devices like laptops.
● Safety Gear: Helmets, elbow and knee pads, and a fully stocked first-aid kit ensure rider safety, and emergency preparedness.
● Optional Accessories: Wind-resistant microphones improve audio quality, and lens filters help manage lighting and enhance footage clarity.
Planning the Shoot
A successful biking video requires more than spontaneous filming. Preparing a shot list or storyboard in advance helps for a more consistent visual narrative. Planning also increases productivity by letting crews or riding partners know when and where to capture critical moments.
Timing is another critical issue. Golden hour, which occurs immediately after sunrise or before sunset, provides the most pleasing natural lighting. Checking the weather ahead of time helps to avoid unexpected conditions that may interrupt production.
Safety First
Before hitting the trail, a pre-shoot safety check is required. Verifying camera mounts, gear functioning, and the bike's condition guarantees that nothing goes wrong throughout the experience. This process reduces risk and ensures uninterrupted shooting.
Tips for Filming Biking Action
Capturing the thrill of biking on camera is all about motion, angles, and energy. To bring that sense of speed and excitement to life, it’s important to use dynamic filming techniques that make viewers feel like they’re part of the ride. Here’s how to achieve that feeling:
● Start by switching up your angles. Helmet and chest mounts are great for first-person shots that pull viewers into the action. Handlebar or rear-facing mounts add variety, showing trail changes or chasing riders. For smoother footage on rough terrain, gimbals or action cameras with built-in stabilization are essential. They reduce shake and keep the focus on the ride, not the bumps.
● Don't forget about wide-angle and drone shots. A drone can capture gorgeous overviews of your bicycle path, which is especially handy in mountain biking, where the surroundings are an integral part of the story. To create drama and allow the action to breathe, use slow-motion in important moments, such as jumps or tight twists.
● Try filming a few planned segments where the rider interacts with the camera, like riding past it on a tripod or stopping for a look-back shot. These clips add personality and break up the motion.
● Sound is sometimes underestimated, but it makes a significant contribution. If possible, use a wind-resistant microphone to record the gear shifting, tyre sounds, or ambient nature noise.
Above all, keep rolling. The best biking clips often come from spontaneous moments. The more footage captured, the better the edit and the more exciting the final video will be.
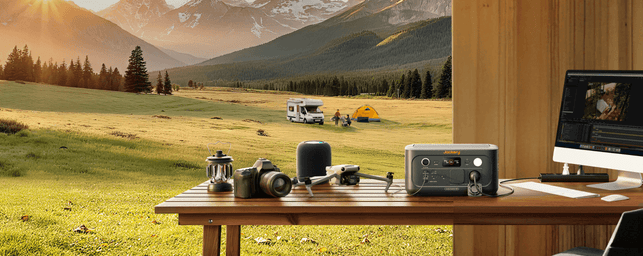
Editing On the Go – Powered by Jackery
Putting the finishing touches on biking footage is where the real magic happens. While the ride provides the raw energy, editing transforms that action into an engaging story that viewers can feel. With portable power solutions like the Jackery Explorer 240 v2 Portable Power Station and Jackery Explorer 500 Portable Power Station, editing doesn’t have to wait until you're home. Not to mention that it keeps camera batteries, drones, and phones powered at all times.

The Jackery Explorer 240 v2 packs 256Wh of durable LiFePO4 power into a 7.94-lb, backpack-friendly frame with a foldable handle for easy carry. Its ports, including a 300W AC outlet and 100W USB-C two-way PD port, fuel laptops, cameras, and SSDs for seamless editing between laps. Flash-charge fully in just one hour via USB-C input for quick turnarounds without downtime. Rated for 3,000 cycles, it recharges quietly (42 dB) via solar for zero-emission power on dusty fire roads. With five versatile ports and remote app control, it’s the trail-tested powerhouse every rider-editor needs.

The Jackery Explorer 500 Portable Power Station packs a powerful 518 Wh lithium-ion battery and a 500 W pure sine-wave inverter (1 000 W surge) into a compact, lightweight chassis. It can simultaneously power drones, laptops, and other devices, making it ideal for emergency backup. Despite its power, it operates quietly at just 46 dB, so you can work or relax without distraction.
That being said, here’s how to get the most from your footage with smart editing techniques, made possible with a dependable power generator by your side.
Editing Tips for Maximum Impact
Tip 1: Keep the Pace Up with Fast Cuts
The editing should reflect the speed, excitement, and adrenaline that come with riding a mountain bike. When viewers are anticipating motion, prolonged, still images can come across as sluggish and uninteresting. Short, crisp cuts combined with fast-paced editing produce a sense of momentum that replicates the actual experience of being on the route.
Start by reducing the amount of footage to just the ride's most dramatic sections. Imagine curves, leaps, tough terrain, or beautiful scenery. To emphasize important scenes, incorporate fast cuts, camera angle changes, and sporadic slow motion (applied sparingly). These strategies keep viewers' interest and maintain the video's pace without sacrificing its excitement.
Tip 2: Use Colour Grading to Enhance the Ride
Not every moment of a bicycling session is captured in raw video. Colour grading can help with that. It turns ordinary clips into dramatic sequences that provide a visual narrative.
Enhancing green tones and shadows, for instance, gives forest pathways more depth and richness. Enhancing contrast and adding a hint of sepia tone helps draw attention to the trail's texture and the dust in the air when filming in rocky or desert environments. Warming up the highlights and reducing the shadows during golden hour helps bring out the enchanted lighting.
Colour grading doesn't have to be difficult; even tweaks made with basic presets can significantly improve visual appeal and help establish the tone of each scene.
Tip 3: Match Music and Sound to the Action
Great sound design can make a biking video feel alive. Viewers often don’t realize how much sound impacts their experience until it’s missing. A well-chosen soundtrack that syncs with the tempo of the ride brings everything together.
Use music that complements the trail's tone and is royalty-free. Mellow, ambient music is appropriate for slower eco-bicycling clips, while lively tracks with lots of percussion are good for sport or downhill riding. For added authenticity, include realistic sound effects such as tyre crunches, wind rushes, gear clicks, or even rider yells.
Go one step further and match action photos with musical sounds, such as a drum hit as the rider jumps or speeds out of a corner. This small editing touch gives your videos a polished appearance.
Tip 4: Create Short and Long-Form Content
A single biking session can fuel days of content. While long-form videos are ideal for YouTube, where audiences expect a full ride or trail review, short-form videos thrive on platforms like TikTok, Instagram Reels, and YouTube Shorts.
Combine highlight reels from a single ride, such as a 15-second teaser with a drone flyover and a trail preview, or a 60-second edit showcasing the best jumps. This tactic attracts a variety of viewers and boosts visibility across platforms. Additionally, it increases the value of each ride in terms of content production.
Tip 5: Add GPS, Speed, and Trail Data
Biking fans love to see data. Overlaying GPS routes, speed meters, and trail maps adds another layer of information that’s both engaging and practical. These elements give viewers context; they can see how fast the rider was going, what trail was ridden, and how the terrain changed.
Adding this data to your video is simple with programs like Garmin VIRB Edit and GoPro Quik. It attracts other riders who might want to explore the same track themselves in addition to having a sleek appearance.
Tip 6: Stay Powered Up with Jackery
None of this editing can happen without power, especially when filming and editing in remote locations. That’s where the Jackery Explorer 240 v2 comes in. This portable power station is compact yet powerful enough to charge cameras, phones, drones, and even laptops right on-site.
Whether parked at the trailhead or camping out after a long ride, having a reliable power generator allows you to start editing while the experience is still fresh. No waiting, no battery anxiety, just smooth, on-the-go production that keeps the creativity rolling.

Optimizing Your Mountain Biking Videos for Social Sharing
Once a biking video is edited and polished, the next step is making sure it gets seen. Even the most exciting footage can go unnoticed if it’s not optimized for SEO and social platforms. A few simple tweaks to the title, description, and hashtags can significantly boost visibility and engagement. Here are some helpful ways to properly optimize your content:
Creating Engaging Titles and Descriptions
A strong title should be clear, descriptive, and keyword-rich. Instead of something generic like “My Ride,” go for: “Epic Trail Biking Through the Swiss Alps | GoPro POV Adventure”. This instantly tells viewers what to expect and includes search-friendly keywords like trail biking, mountain biking, and “GoPro POV.”
In the description, give a short summary of the ride, the location, the gear used, and any challenges faced on the trail. Be sure to naturally incorporate keywords such as sport biking and eco biking. This helps the video surface in both search engines and on platforms like YouTube and Instagram.
Using the Right Hashtags
Hashtags help categorize your content and expand its reach. Use a mix of general and niche tags such as:
#mountainbiking #trailbiking #sportbiking #ecobiking #GoProAdventure #BikingLife
This increases discoverability and connects your content with biking communities across platforms.
The Best Platforms to Share On
● YouTube Shorts: Great for fast-paced, vertical clips.
● Instagram Reels: Ideal for short, high-energy edits with music.
● TikTok: Perfect for trends, challenges, and bite-sized biking content.
● Strava: Share GPS-linked video clips with your ride data to engage fellow riders.
By optimizing each post, biking videos can reach a wider audience and resonate with riders looking for inspiration, trails, and new adventures.
Why Jackery Is a Must-Have for Every Biking Shoot
Every stage of making a fantastic mountain biking video, from preparation and filming to editing and sharing, depends on dependable power, particularly while you're off the grid.
The Jackery Explorer 240 v2 Portable Power Station guarantees that your equipment stays charged wherever the path takes you. It’s the perfect travel companion for computers, action cameras, and drones because it is portable, strong, and lightweight.
Visit Jackery to learn more about off-grid video shooting tips!