
1. Introduction
The use of solar systems to generate green electricity is certainly no longer a novelty. Solar panels and balcony power plants are becoming increasingly popular as a way of producing your electricity, making your life more sustainable in the long term, and reducing your electricity costs. With technologies such as the solar system with storage from Jackery, you can even store the electricity you produce yourself for later use by household appliances, for example.
It doesn't matter whether you opt for a PV system on the roof or a balcony power plant, as planning should be carefully considered in both cases. One thing is essential when connecting a balcony power plant: a detailed and informative wiring diagram. In this article, we will therefore show you why you should draw up such a circuit diagram and what you need to bear in mind when installing a balcony power plant.
1.1 Overview: The Most Important Points
· A balcony power plant makes it possible to generate environmentally friendly electricity and reduce electricity costs at the same time.
· Balcony power plants are suitable for both tenants and homeowners, as they can be installed on balconies, patios, or gardens in a variety of ways.
· Registration with the grid operator, a secure connection to the power grid, and a suitable wiring diagram are essential for correct connection and operation.
· A wiring diagram helps to connect the components of a balcony power plant correctly and avoids incorrect connections, which increases safety.
· Portable solar generators from Jackery offer a practical, mobile, and simple way of utilising solar power without a fixed installation.
2. How to Connect Your Balcony Power Plant to
A balcony power plant is an uncomplicated and inexpensive alternative to a rooftop solar system. Due to its versatility, the panels of the balcony power plant do not have to be mounted on the roof. Instead, as the name suggests, they can be installed on the balcony. But this is not the only option: the solar panels can also be installed in the garden, on the façade, or in a carport, for example. When choosing a location, factors such as solar radiation, safety, and orientation should be considered.
Thanks to the many installation options, a balcony power plant is also suitable for users who do not own their own home and do not have access to the roof, such as tenants. In addition, the installation of a balcony power plant involves fewer requirements and lower investment costs and can be carried out by the user themselves. The balcony power plant, therefore, offers a smart alternative to traditional solar systems.
A balcony power plant is usually connected via one or two solar panels to a microinverter, which converts the direct current generated into standard household alternating current. The balcony power plant inverter is connected directly to a socket via a special feed-in cable. The system then feeds the electricity into the household grid. It is important that the system must be registered with the grid operator and that it is installed and earthed safely and in accordance with the regulations. A circuit diagram can also be helpful if a balcony power plant with storage is to be connected.
3. Circuit Diagram for a Balcony Power Plant
A circuit diagram for a balcony power plant with storage is a schematic representation, comparable to a construction plan. It shows how the individual components of a balcony power plant are connected to each other and serves as a guide to understand the structure and operation of the system. The circuit diagram helps you with both installation and maintenance by illustrating the flow of electricity from generation to utilisation.
Such a diagram can either be included in the scope of delivery or created individually if required. It is essential for correct installation and helps to avoid incorrect connections, which increases the safety of the system. In addition, the wiring diagram provides a clear visualisation of all components and is particularly useful for non-professionals who want to connect their balcony power plant themselves.
This is how the circuit diagram of a balcony power plant is made up:
· PV modules (solar modules): With a balcony power plant, the solar modules can be mounted on the terrace, balcony, or façade of a house. All modules have two connections: a positive pole and a negative pole. This is where the direct current (DC) is generated.
· Inverter: The inverter is located behind the solar modules in the circuit diagram, as it is connected directly to them. This is where the direct current generated is converted into usable alternating current (AC).
· Connection to the power grid: The inverter is connected to a suitable socket (Schuko or Wieland) via a cable. This feeds the electricity into the household grid so that it can be used throughout the house.
· Battery storage: The storage unit is mainly located between the solar modules and the inverter or is integrated directly into the inverter.
· Fuse elements: Fuse elements also belong in every circuit diagram of a balcony power plant to prevent overloading or short circuits.
4. Connecting the Balcony Power Plant Correctly in 6 Steps
Before you can connect your balcony power plant, you should first make sure that all preparations have been made. Have you found a suitable location for the modules and the balcony power plant? Do you have all the parts you need? Do you have assembly instructions or a wiring diagram for connecting your balcony power plant? Once these precautions have been taken, you should proceed as follows for the connection:
Step 1: Register with the grid operator
Before you get started with the connection, you should register your balcony power plant with the grid operator at least two weeks in advance. This registration is mandatory in Germany.
Step 2: Attach the bracket
Once you have chosen a place for the solar modules, the bracket must be attached. Follow the manufacturer's installation instructions carefully.
Step 3: Installing the inverter
The inverter is the centrepiece of the balcony power plant. Find out whether a location for installing the inverter is specified in the installation instructions. The location of the inverter should ideally be well ventilated, cool, and protected from rain and direct sunlight.
Step 4: Install solar modules
Attach the solar modules in accordance with the installation instructions. You should get a second person to help you with this, as the solar modules are often unwieldy.
Step 5: Wiring the balcony power plant
The individual components must now be connected to the domestic power supply using cables. Follow the manufacturer's installation instructions and/or the wiring diagram. The solar panels must be connected to the inverter and - if available - to the battery storage system.
Step 6: Connecting to the power grid
Finally, connect the inverter to the power grid via a domestic power socket. The electricity generated is then fed directly into the household grid and is available for use.

5. Differences Between Balcony Power Plants With and Without Battery Storage
There are three different types of balcony power plant:
· Balcony power plant with inverter without storage
· Balcony power plant with inverter and separate storage
· Balcony power plant with inverter with integrated storage
These three designs differ slightly in their structure:
1. Balcony power plant with inverter without storage
Here, the solar modules are connected directly to the inverter, which in turn is connected to the domestic grid.
2. Balcony power plant with inverter and separate storage unit
Here, the solar modules are first connected to the storage unit. The storage system is connected to the inverter, which in turn is connected to the domestic grid.
3. Balcony power plant with inverter and integrated storage
Here, the storage and inverter are the same component. The structure is therefore the same as in the case without a storage system: The solar modules are connected to the inverter, which has an integrated storage system. This is connected to the domestic grid.
6. How to Use Different Plugs and Connections
Balcony power plants can be connected either with Schuko plugs or with special Wieland plugs. These differ in their design and safety in use. A Schuko plug is the standard household plug, which is simply plugged into a normal socket. A Wieland plug, on the other hand, is specially designed for balcony power plants and similar applications and offers additional safety features such as contact protection and a locking mechanism to prevent accidental disconnection
Schuko plug:
|
Advantages |
Disadvantages |
|
· Easy to use |
· Lower safety standards |
|
· Widely used |
· Not suitable for grid feed-in |
|
· Cost-effective |
· Risk of overheating |
Wieland Plug:
|
Advantages |
Disadvantages |
|
· Higher safety |
· More expensive |
|
· Locking mechanism and contact protection |
· Installation requires an electrician |
|
· Often required by grid operators |
· Only suitable for grid feed-in |
7. Can I Connect My Balcony Power Plant Myself?
Thanks to its uncomplicated installation, you can also connect a balcony power plant yourself. You don't need a specialist to do this. However, you should make sure that you fulfil the technical requirements and observe the safety regulations.
The balcony power plant must always be registered with the grid operator and the Federal Network Agency. A Wieland plug is often required if the electricity is to be fed into the grid. As a tenant, you should coordinate the installation with your landlord, as the balcony power plant can cause structural changes to the building. You should always ensure that the installation is safe and stable and that no fixed parts of the building are damaged. It should also be possible to reverse the installation at any time.
In addition to the legal requirements, there are also technical requirements that must be met if you want to connect a balcony power plant yourself. You need all the components: solar modules, a compatible inverter, and a Wieland feed-in socket or a tested Schuko socket. The mains load and fuse should also be checked. If you want to be on the safe side, you can consult an electrician for professional earthing.
As a general rule, balcony power plants are designed in such a way that you do not need to hire a specialist to connect them. Solutions such as Jackery solar generators make generating solar power easier than ever before. There is no need to install large solar panels on the façade or balcony. The panels can simply be set up in the garden or at another location and moved again at any time.

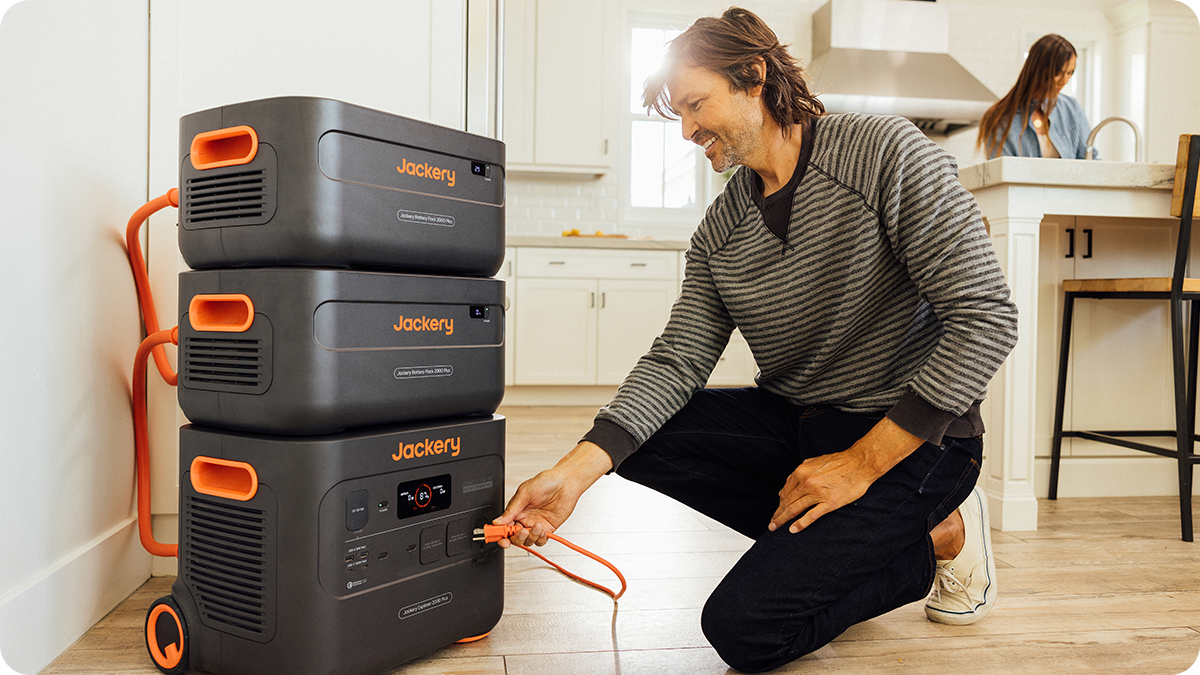
8. Jackery Solar Generators
Jackery is a leading provider of solar systems with 13 years of experience. From balcony power plants and solar generators to high-performance power stations, Jackery’s diverse product range offers everything you need for a self-sufficient power supply.
With Jackery solar generators, you can produce your own electricity using the power of the sun, anytime and anywhere you like. Thanks to their compact and lightweight design, Jackery solar generators are easy to take with you wherever you go. That means they’re always exactly where you need them, whether for generating or using electricity.
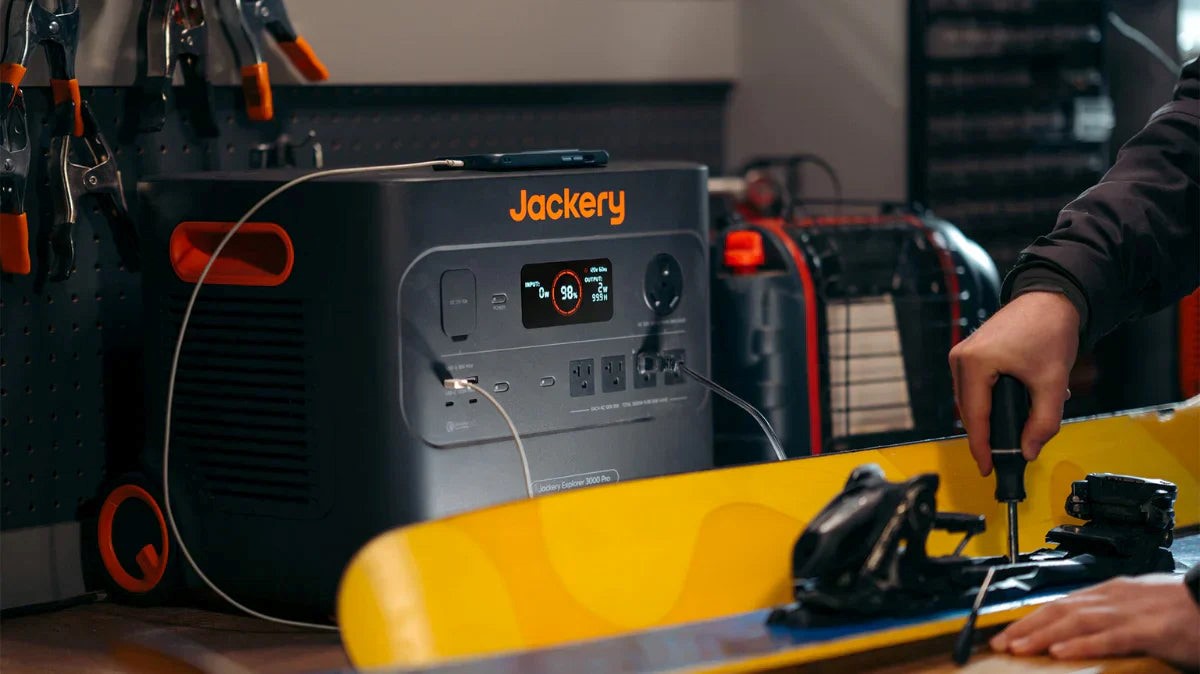
The Jackery Solar Generator 3000 Pro offers a capacity of 3024 Wh and ultra-fast charging: just 1.8 hours via wall outlet and 3–4 hours using the integrated solar panels. It is also 30% lighter and more compact than comparable models, and extremely quiet at only 30 dB. Its efficient cooling system and upgraded battery management system ensure safe operation. Additionally, the Jackery Solar Generator 3000 Pro is cold-resistant down to -20°C and comes with a 5-year warranty.
If you need slightly less power but still don’t want to compromise on reliability and quality, the Jackery Solar Generator 2000 Pro is a great option. It offers a capacity of 2160 Wh and can be fully recharged in just 2 hours using the included solar panels. Overall, it shares the same key advantages as the larger model.
Jackery solar generators are not only ideal for use on the go — they also perfectly meet the needs of any household. The position of the solar panels can be flexibly adjusted based on sunlight exposure, and the portable design of the power station ensures versatile use as a power source. This way, you can avoid the need to install a balcony power plant and don’t need a wiring diagram to connect the balcony power plant.
9. Can a Balcony Power Plant Be Connected to a Junction Box?
Yes, a balcony power plant can be connected to a junction box. However, this requires technical expertise. The connection is made via the inverter, which feeds the electricity into the household grid. The inverter must be connected to the junction box, ideally using a Wieland plug, which provides additional safety.
It is essential to check the grid load, ensure proper protection for the feed-in, and install all components in accordance with regulations. An electrician should inspect the connection to prevent errors and risks. Additionally, the system must be registered with the grid operator and the Federal Network Agency.
10. FAQs
1) Which Jackery solar generator do I need for my household?
To calculate the required capacity of a solar generator to power your household devices, use the following formula:
Explorer capacity × 80% ÷ wattage of the device.
The result tells you how long you can operate your device using the respective solar generator.
2) How is a balcony power plant connected to the power grid?
A balcony power plant is connected to the power grid via the inverter, which plugs into a socket (either Wieland or Schuko).
3) Does it matter which phase the balcony power plant is connected to?
Yes, it does matter — electricity can only be used on the phase to which the system is connected.
4) What needs to be considered when connecting a balcony power plant?
You should take all necessary steps into account: registration with the grid operator, compliance with safety regulations, use of the correct plug (often Wieland), and proper professional installation.
5) How long can the cable from the balcony power plant be?
The cable should be no longer than 10–15 meters to minimize power loss.
11. Conclusion
A balcony power plant is a simple and cost-effective way to generate sustainable electricity and reduce energy costs. Thanks to its versatile installation options, it is suitable for both renters and homeowners. Installation involves a few key steps, such as registering with the grid operator, selecting a suitable location, proper wiring, and a safe connection to the power grid.
One especially important aspect when connecting a balcony power plant is a wiring diagram, which clarifies the system’s structure and function and helps prevent incorrect connections. Solutions like Jackery solar generators also offer portable and efficient alternatives that require no fixed installation and provide maximum flexibility.